

A patio doesn’t need a contractor and a five-figure budget. With basic tools, affordable materials, and a weekend or two, homeowners can build functional outdoor living spaces that hold up to weather and daily use. The key is picking projects that match skill level and local codes, some ideas require nothing more than a shovel and level, while others involve cutting, fastening, and minor electrical work. This guide covers ten practical DIY patio ideas, from ground prep to finishing touches, with real material specs and honest assessments of what each project demands.
Table of Contents
ToggleKey Takeaways
- DIY patio ideas can transform your outdoor space in a weekend or two without hiring a contractor, using affordable materials and basic tools matched to your skill level.
- Proper ground preparation—including drainage sloping (1/4 inch per foot away from the house) and a 4–6 inch compacted gravel base—prevents settling, cracking, and weed growth that compromise long-term durability.
- Budget-friendly flooring options like gravel patios ($2–4 per square foot) or pallet wood provide cost-effective alternatives, though pallet decking typically lasts only 3–5 years in exposed conditions.
- Built-in seating solutions such as cinder block benches or 2×4 frame designs maximize space and reduce furniture costs, with a concrete paver and 4×4 dining table costing under $80 to build.
- Shade structures like freestanding pergolas ($250–400 for 10×10 feet) and sail shades avoid permits in most areas, while low-voltage LED lighting systems ($100–200) safely extend your patio’s usability after dark.
- Always check local zoning requirements, call 811 to mark utilities before digging, and hire a licensed electrician for permanent hardwired outdoor electrical work to ensure code compliance and safety.
Planning Your DIY Patio Project
Before breaking ground, check local zoning and setback requirements. Many jurisdictions allow non-structural patios (gravel, pavers, and low-deck platforms under 30 inches) without permits, but rules vary. Call 811 to mark underground utilities at least three business days before digging.
Measure the space and sketch a scaled plan on graph paper. A functional patio typically needs at least 10×10 feet for a small seating area, or 12×16 feet for a dining table and chairs. Factor in drainage: patios should slope 1/4 inch per foot away from the house to prevent water pooling.
Decide on base prep early. Gravel bases (4–6 inches of compacted crushed stone) work for pavers, flagstone, and gravel patios. Wood decks need concrete footings below the frost line (check local frost depth, typically 12–48 inches depending on region). Skipping proper base work causes settling, cracking, and weed growth within a season.
Gather tools before starting: a level (4-foot or laser), tamper (plate compactor for larger areas, hand tamper for small jobs), circular saw or miter saw, drill/driver, wheelbarrow, and safety goggles. Rent a plate compactor if the patio exceeds 100 square feet, hand tamping that much base takes too long and won’t compact evenly.
Creative Flooring Solutions on a Budget
Flooring makes or breaks a patio’s durability and look. Here are two budget-friendly options that don’t require specialized skills.
Gravel and Stone Patio Designs
Crushed stone or pea gravel patios cost $2–4 per square foot for materials and take a weekend to install. Excavate 4–6 inches deep, line with landscape fabric (woven polypropylene, not flimsy weed barrier), then fill with 3–4 inches of ¾-inch crushed stone as a base. Top with 2 inches of decorative gravel, pea gravel (smooth, ¼–½ inch), crushed granite, or decomposed granite (DG).
Edge the perimeter with steel or aluminum landscape edging (about $1.50–3 per linear foot) to prevent gravel migration. Plastic edging warps and cracks in sun: skip it. For a more permanent border, set 4×4 timber or concrete pavers on edge, anchored with 12-inch landscape spikes.
Pea gravel drains instantly, which is ideal for wet climates, but it shifts underfoot, not great for furniture. Decomposed granite compacts firm when wet, creating a stable surface that resembles packed dirt. Both need top-up every 2–3 years as material compacts and migrates. Drawing inspiration from outdoor living spaces can help refine material choices for regional climates.
Pallet Wood and Reclaimed Material Flooring
Pallet decking is a popular DIY flooring hack, but it has limits. Standard shipping pallets (48×40 inches) are made from oak, pine, or mixed hardwoods, often treated with methyl bromide (MB) or heat treatment (HT). Only use HT-stamped pallets, MB pallets contain pesticides not safe for prolonged contact.
Dismantle pallets with a reciprocating saw or pry bar, pull nails, then plane or sand boards to remove splinters. Pallet wood is nominal ¾ inch thick (actual ~5/8 inch) and widths vary (3–4 inches). Lay boards on a gravel base with landscape fabric, or build a low frame from 2×4 pressure-treated lumber on concrete deck blocks (about $4–6 each).
Gap boards ¼ inch apart for drainage and screw them down with 2½-inch deck screws (galvanized or coated). Finish with exterior wood stain or sealer (one gallon covers ~200–300 square feet). Expect pallet wood to last 3–5 years in exposed conditions, it’s not pressure-treated, so rot and insect damage are inevitable. This approach works for temporary or seasonal patios, not permanent structures.
Reclaimed barn wood, fence pickets, or composite decking scraps follow the same principle. Just verify the material’s origin and treatment. Salvaged composite decking is excellent if you can source it, it’s rot-proof and often free from teardowns.
DIY Furniture and Seating Ideas
Built-in seating saves money and maximizes space. Cinder block benches are the simplest: stack 8×8×16-inch concrete blocks (about $2 each) in a U-shape or L-shape, then top with 4×4 or 2×10 pressure-treated boards. No mortar needed for low benches (two blocks high). Add outdoor cushions (make your own from outdoor fabric and high-density foam) for comfort.
For a cleaner look, build a 2×4 frame bench with a 2×6 seat and backrest. Cut legs to 16–18 inches for seating height. Assemble with 3-inch deck screws and exterior wood glue. Stain or paint with exterior-grade finish, one quart covers a small bench. Sand all edges to 120-grit before finishing to avoid splinters.
Pallet furniture (chairs, tables, loungers) is trendy but requires reinforcement. Double up pallet deck boards for tabletops and seats to handle weight. Add L-brackets at joints for stability. A pallet coffee table needs locking casters (rated for at least 100 pounds each) if it’ll be moved frequently.
For dining, a concrete pavers and 4×4 post table is sturdy and weatherproof. Set four 12×12-inch pavers on a level gravel base as legs, then lay two 4×4 posts (8 feet long) across them as supports. Top with 2×6 planks screwed perpendicular to the 4×4s. Total material cost: under $80 for a 6-foot table. Seal wood with penetrating oil sealer (like linseed or tung oil) for a natural look that won’t peel.
Many porch and outdoor living ideas showcase regional furniture styles that adapt well to DIY builds with off-the-shelf lumber.
Adding Shade and Privacy Features
Full sun makes a patio unusable in summer. Shade structures don’t require a general contractor, but anything attached to the house or over 120 square feet often needs a permit. Freestanding options avoid most code issues.
A sail shade is the fastest install. Mount eye bolts (½-inch diameter, galvanized) into house studs, fence posts, or 4×4 posts set in concrete footings (12 inches diameter, depth per frost line). Tension the sail with turnbuckles to prevent sagging. Quality UV-rated polyester sails (12×12 feet) cost $40–100 and last 5–8 years. Cheaper sails fade and tear in one season.
For permanent shade, build a simple pergola from 4×4 posts (8–10 feet long), 2×6 rafters, and 2×2 slats. Sink posts 24–36 inches deep in concrete (one 60-pound bag per post). Bolt 2×8 beams across post tops with ½-inch galvanized carriage bolts, then notch and screw rafters across beams at 16–24 inch spacing. Run 2×2 slats perpendicular across rafters, spaced 6–12 inches apart depending on desired shade density.
A 10×10-foot pergola uses roughly $250–400 in lumber (pressure-treated pine: cedar costs nearly double). Cut all lumber with a miter saw for clean angles. Stain or leave untreated, pressure-treated lumber grays naturally.
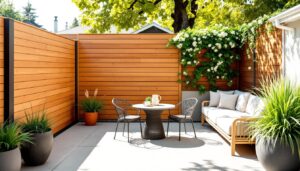
For privacy, lattice panels (4×8 feet, about $25–40 each) attach to 4×4 posts with deck screws and washers. Set posts in concrete, then screw panels between them. Plant climbing vines (clematis, jasmine, or hops) at the base for living coverage. Alternatively, build a horizontal slat fence from 1×4 or 1×6 boards spaced 1–2 inches apart, mounted to a 2×4 frame. It’s more work than lattice but looks cleaner and blocks sight lines better.
Lighting and Finishing Touches
Patio lighting extends usability after sunset. Low-voltage LED systems (12V) are DIY-friendly and don’t require an electrician. A basic kit (transformer, cable, 6–8 fixtures) costs $100–200. Mount the plug-in transformer near an outdoor GFCI outlet, run 12-gauge or 14-gauge landscape wire along the patio edge (bury 6 inches deep or run under edging), and stake fixtures into soil or mount on posts.
Space path lights every 6–10 feet. For ambient lighting, use string lights (LED Edison bulbs rated for outdoor use) hung between posts or along a pergola. Secure with cable clips or eye hooks. Avoid incandescent bulbs, they draw more power, generate heat, and burn out quickly.
Solar lights work if the patio gets 6+ hours of direct sun. Cheaper models (under $15) fail within a year: spend $25–40 per fixture for lights with replaceable NiMH batteries and durable housings.
For hardwired lighting (overhead fixtures, recessed deck lights), hire a licensed electrician unless you’re comfortable working with 120V wiring per NEC code. Most jurisdictions require permits and inspections for permanent outdoor electrical work.
Finish with planters and greenery. Build planter boxes from 2×6 or 2×8 boards (cedar or pressure-treated), lined with landscape fabric to prevent soil contact with wood. Drill ½-inch drainage holes every 6 inches in the bottom. Fill with potting mix, not garden soil, potting mix drains better in containers.
Add a DIY fire pit if local codes allow (many cities restrict open fires within 10–25 feet of structures). A simple in-ground fire pit involves digging a 12-inch-deep bowl, lining it with fire bricks or stacked retaining blocks, and edging with stone. Use lava rock or fire glass as a base layer for gas fire pits (propane or natural gas). Never use river rock, it can explode when heated.
Many rustic outdoor projects incorporate reclaimed materials and vintage finds for character without the cost of new decor. Scour salvage yards for wrought iron furniture, ceramic pots, or old shutters to repurpose as patio accents.